Good day to all, I have decided that I need to start stepping up my blogging frequency and after a week of trying to figure out what to write about (my current projects have not provided any exceptional materials to cover). I have decided to start a new series, "New PBCS Feature". This seems like a natural thing to do, I already review and test new features that sound interesting, so why not write it up for everyone else to enjoy?
With that said, the first iteration of this series will be on the new feature that enables users to enter data into suppressed row members. This is a common requirement that I get from clients, normally on the account dimension. So, let’s take a look at an example.
In this example: an Account dimension has 1500 members, and I have selected an entity to plan expenses on. The form has Account in the Rows and Period in the columns, with a column for YTD actuals as well. This is a very common set up, so I think everyone can relate. Typically, each entity is only planning on 15-20 expense lines, where the amounts are updated on a monthly basis. Thus we can enable suppression to make the form more usable. Any new expense lines that hit actuals will automatically show up and be editable to users, but what if they want to plan on a different account? In the past we would need to evoke a business rule to populate that account with a 0 or something along those lines for it to show up, not exactly second nature to users who do this once per year.
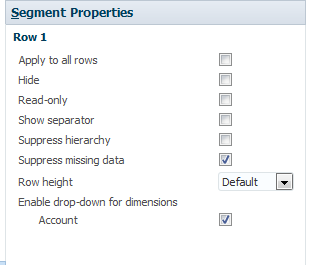
What can we do now? First enable the option “Enable Drop-down for dimensions” in the appropriate Row segment and Dimension for the form.
Once enabled users will see a drop down next to the value, clicking on it will open a list of available members
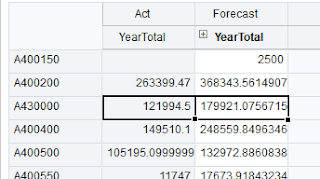
Then, users can select a member, which will change the current member to that one.
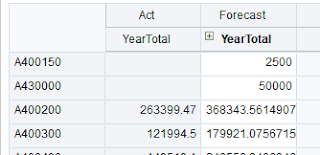
In this example you can see I changed A400300 to A43000, however the data displayed has not changed. To change the data, you can edit and save these values by doing basic inputs.
Finally, the user needs to click “Save” and the form will refresh with the new member in its proper place, with the inputted data.
And that’s all there is to it.
I hope this helped you to understand this new feature, and I look forward to providing you with more updates like this.
Until then!
-Dan


thank you for the blog
ReplyDeletethanks a lot
ReplyDelete